Plaster can be a versatile finish, allowing you to create a variety of effects in your space. It can be put into a mold to create a cast, stenciled onto, painted, and it can be shaped into just about anything imaginable. So, it is no surprise that there is a resurgence of people are experimenting with ways to create unique finishes using plaster, and that interest in the topic is on the rise.
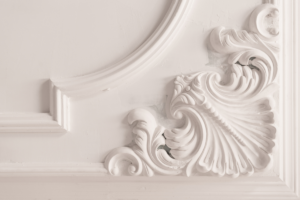
If you have never heard of stenciling a design on plaster before, that’s ok. It’s a design choice that hasn’t been seen much since the days of Craftsman homes. But, social media trends show that creating stencil designs on plaster walls is becoming popular again, especially as it offers homeowners and businesses a variety of new ways to customize different spaces. This means that searches related to tips and tricks on which tools and tricks to use to make plaster stencil designs look flawless are on the rise, so we wanted to share what we know about this.
We found some of the most common issues that can occur when using a stencil to create designs on plaster, and asked the drywall finishing professionals what tools and tips you can use to avoid them. Read through to see what the professionals say about how they avoid these issues, and what tips they use to make every stencil job finish flawlessly.
PROBLEM: PLASTER IS CLUMPY AND HARD TO SMOOTH INTO STENCIL
As industry professionals know, the type of mud you use for a job matters – as does how it is mixed. Some applications call for a thinner viscosity, while others require a thicker consistency of mud. When applying a stencil to plaster, the type of mud used matters just as much as how you apply it.
PRO TIP: MIXING MATTERS
The number one tip from every professional is to MIX YOUR MUD. Settling and clumping can occur in the product, and mixing the joint compound ensures a smooth and even product. Professionals say that poorly-mixed mud is the number one cause of cracks and lumps in plaster finishing. A mud mixing tool is a fairly inexpensive investment, but it is likely the most important one.
PRO TIP: ALL PUPRPOSE JOINT COMPOUND IS BEST
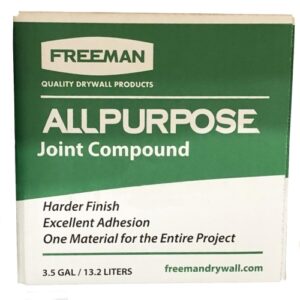
Some people think a thicker mud, like a patching compound, would be best for stencil application. However, many experienced plasterers say that an all-purpose joint compound is best. It is thick enough that it can adhere to the wall without dripping or sliding, but not too thick to where it cracks when it dries. The all-purpose compound also tends to dry more evenly, helping to prevent cracking. Read more about mixing mud for different applications here: https://blog.walltools.com/mud-mixing-for-different-applications/.
PROBLEM: PLASTER BLEEDS UNDER THE STENCIL
One of the most common issues with trying to plaster stencil designs onto a wall is that when you remove the stencil, after applying the plaster, you find that the edges of the design aren’t smooth and there is plaster bleeding out under the edges. No matter how hard you try to press the stencil to the wall, it doesn’t stop it from bleeding under.
PRO TIP: LESS IS MORE
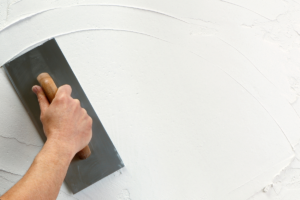
You won’t need to make your design very thick for it to stand out. You don’t want to use a thick glob of mud over the stencil – and don’t mash it down. You want to use a gentle but firm swipe over the stencil, and you want to swipe from top to bottom in one smooth motion, making sure you have the stencil firmly in place. If there are any spots that were missed, raised lines, or nicks, you can use a second swipe to correct the issues. The tip is to not swipe a bunch of times, because the more times you swipe, the more you will distribute the mud out and under the stencil.
PRO TIP: TEST IS BEST
The professionals suggest you test one area before you try doing the entire wall. You should try your design, your mud, and your drying so that there are no surprises after you’ve done an entire wall. You might need to change the viscosity of your mud because it is too runny or clumpy, or your drying time might take longer than you are expecting. Testing your stencil design allows you to see what kinds of issues can arise, and best of all, it can easily be cleaned up or removed if you make a mistake – even after it is dry.
PROBLEM: SANDING AROUND THE DESIGNS IS DIFFICULT & TIME CONSUMING
“I love sanding,” is a phrase that has never been spoken, but sanding plaster is a fact of life for drywall finishing professionals – and many DIYers. There are some tips and tricks that the professionals use to minimize the time & effort spent sanding, while minimizing effort and mess. Sanding around intricate designs can take even more time, and you risk ruining the design in the process, so we hope the following pro tips for sanding will save you a few headaches.
PRO TIP: SAND FIRST
You should sand the area where you will be applying the plaster and design – before you begin. Whether you are starting with a previously-painted area, or it is a brand-new wall, you want a smooth, clean surface to start with. Sanding can etch the existing paint, allowing the new plaster to stick to the rough surface, or it can create a smooth base for you to start with on freshly-finished walls. Either way, you want to make sure any areas that need sanding are addressed before you begin applying your stencil designs to the plaster.
PRO TIP: CHOOSE GOOD TOOLS
It can be tempting to go with the bargain tool options, especially if you are working on a smaller project. But, any drywall professional will tell you that the tools you choose matter – a lot. If you are trying to create a flawlessly smooth finish, you want to make sure that your finishing knife is high-quality, has a flat edge, and has no chips or nicks. All of these issues can create an uneven finish, which can ruin the finished product. The smoother the plaster is before it dries, the less sanding it will need afterward.
PRO TIP: USE A WET SPONGE
This one is a not-so-secret secret of the trade. Professionals know that you can smooth out most issues with a wet sponge, especially with one that is made specifically for drywall sanding. Drywall sanding sponges usually have a coarse side and a smooth side, which act as a coarse grit and fine grit, respectively. Start with the coarse side to remove any uneven spots, then with a barely damp sponge, go back over the same area with the smooth side in circular motions. If you haven’t tried this method before, it is good to practice in a small area before working on larger spaces. It significantly reduces the dust that can be created during the sanding process, and can create a flawlessly smooth finish.
PROBLEM: THE PLASTER CRACKS AS THE DESIGN DRIES
The most important thing to drying plaster is a consistent environment. If there are drastic changes in temperature, moisture, sunlight, or wind, it can cause plaster to dry unevenly, which is what can cause cracks to occur. If you are trying to create a design on plaster with a stencil, this can be an even more perilous process.
PRO TIP: CONTROL YOUR ENVIRONMENT
To minimize the cracks in your plaster designs, try to keep the environment at the same temperature until it is completely dry. The thicker the design, the longer the design takes to dry, so you want to avoid big swings in temperature or changes in sunlight as much as possible. Additionally, you want to make sure that it isn’t too hot or too cold, because this can also cause the design to dry unevenly, leading to cracks.
If you find yourself having trouble or you have a question about how to use a tool, you can also check out support.walltools.com or visit our Contact Us page for our phone number and email address. Our staff have decades of experience, are very professional, and they are always willing to help.


