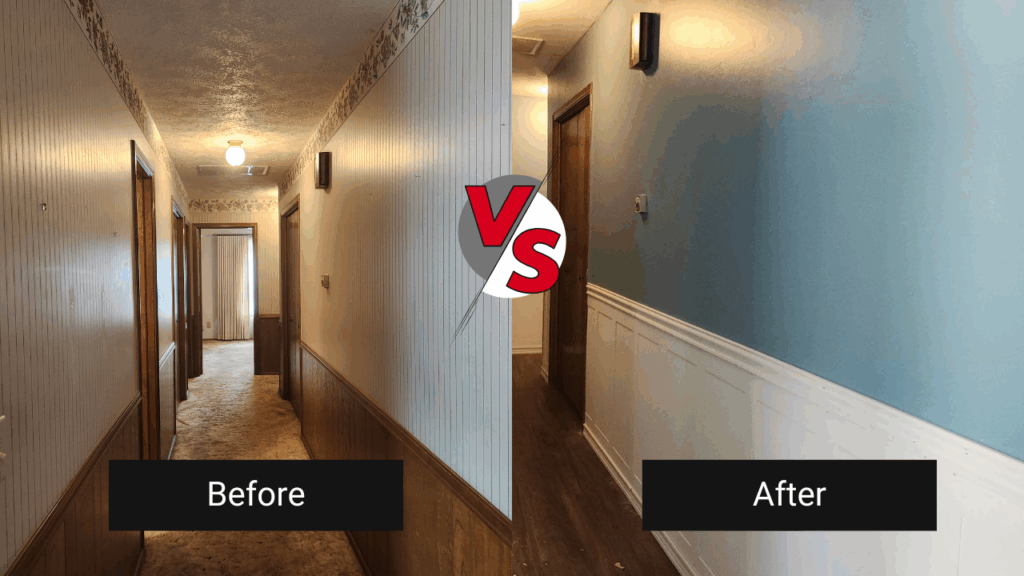
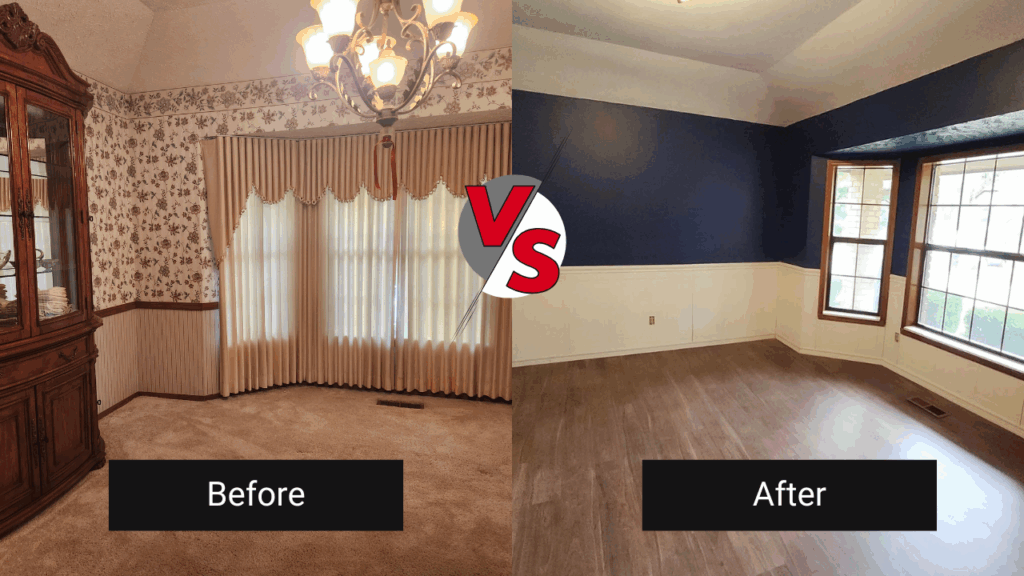
Wallpaper removal is arguably the most disliked job of any wall finishing tradesman or home remodeler. There is no go-to method that will make the job easy, and there is no way to avoid a huge mess in the process. There are several tools available to help make the job easier, but do they really help?
Luckily for our readers, a member of our team purchased a time capsule of a home, with all the original wallpaper from 1981 still hanging on the walls in several rooms. We took this as an opportunity to try some of the most popular tools and methods for wallpaper removal, and we reviewed each method and tool we used below.
Wallpaper Scraper
The most valuable tool in our toolbox is the unassuming scraper. We chose one with a 4-inch blade, and we bought plenty of replacements. The scraper was essential in creating a gap between the paper and the plaster, allowing us to grab the paper more easily and pull sections off the wall.
Upside: The scraper can also assist in separating the paper from snags on the plaster, allowing the paper to lift rather than tear. This helps with leaving less of the paper backing behind on the wall, and makes cleanup go even faster.
Downside: You can slip while scraping and create divots in the plaster (or your fingers), meaning you’ll have to spend some time patching or sanding (or applying first aid) to clean up at the end of the job.
SCORE: 10/10 MUST HAVE
Pro Tips for Using: Replace the blade on the scraper often. You may need several for one room, but it will make the job easier. The blade will get nicked and gummed up as you work, so replacing it often will save you a lot of manual effort.
Wallpaper Softening Spray
While this isn’t technically a tool, it is something we highly recommend. We only recommend using the spray to remove difficult spaces and paper remnants from the wall. The spray helps soften the adhesive, and allows you to wipe away the paper remnants with a cloth or sponge, rather than having to scrape the pieces off.
Upside: It usually starts to work in less than a minute, and has a pleasant smell.
Downside: The mess. The small pieces of paper turn into sticky globs of paper and glue. We recommend only using this product on small areas, and a drop cloth under your work area is highly recommended.
SCORE: 8/10 HIGHLY RECOMMEND FOR SMALL AREAS
Pro Tips for Using: This should be used as a secondary method, rather than a primary one. Only work on small sections of the wall at a time with the spray, because it can dry quickly, especially in jobsites that have high temperatures or poor ventilation. We recommend spraying 2 ft. to 3 ft. sections at a time.
Wallpaper Steamer
This tool was the most expensive one we used for this job, but even then, it didn’t break the bank. It was ready to be plugged in and used right out of the box, which made it very convenient. We also picked up a handheld wallpaper perforator, as it was highly recommended that we perforate the paper before steaming.
Upside: It came with many attachments, so it is a very versatile tool. It can be used to steam clean a lot of surfaces, and (the model we purchased) has an internal timer so it will automatically shut off. The steam softens the adhesive within a few minutes, and it allows the paper to come off the wall in larger sections.
Downside(s): This tool puts out a lot of water. We recommend keeping towels on hand, as you will get little streams of water down the wall as you use the steamer. Also, the steamer can get very hot on the bottom, so we recommend having a solid surface to set the machine on, if you are using it in an area with finished floors.
SCORE: 7/10 EFFECTIVE FOR VERY LARGE JOBS, DIFFICULT TO USE IN SMALLER AREAS
Pro Tips for Using: The steamer uses distilled water, so make sure you pick up a gallon of it on before you get started. Perforate the paper before you steam. Also, start at the top of the wall with the steamer and work your way to the floor, moving slowly in a downward direction. It can take a few seconds for the adhesive to soften, so the top should be ready to be worked by the time you work your way to the bottom of the wall.
Paint Over It
We can never recommend that wallpaper be painted over, but we know that it happens. We decided to give this method a try so that we could report back to you on the results.
Upside: You’ll temporarily cover the wallpaper.
Downsides: There are many. First, eventually, the wallpaper will start to lift at the corners, and so will your paint. This is inevitable as the adhesive fails due to time and nature. Second, you’ll finally be able to see every single bubble of air under the wallpaper, and the paint will make it really stand out. The bubbles will appear wavy in the paint, and can be noticeable, depending on the light. Third, you can create the perfect environment for mold and mildew to grow, as the air pockets in the paper can now collect moisture from the air, but the paint will prevent it from evaporating from the paper. Latex paint can keep moisture intrusion for showing, which is why this is the least recommended method.
Painting over wallpaper is a temporary solution. The paper will still need to be removed at a future date.
SCORE: 5/10 TEMOPORARY FIX, BUT LONG-TERM HEADACHE
Pro Tips for Doing: Most paints are latex-based, and they won’t stick to the wallpaper very well. You’ll have to cover the wallpaper in an oil-based primer first, then paint over it, once it is dry.
Replace The Wall
This is the most extreme option, and one we didn’t employ on this job. But, there are plenty of situations where drywall replacement is not only appropriate, it’s the best solution. We strongly recommend you use a drywall professional for this method.
Upside: No special tools needed for the wallpaper. Your basic tools usually work for drywall removal. A small sledgehammer, a crowbar, and some safety equipment should be enough to do it. BONUS – You’ll have your very own free rage room.
Downsides: This is the most destructive method, causes the biggest mess, and requires more effort and time to replace the walls, tape, finish, then paint.
SCORE: 10/10 PERFECT RESULTS AND YOU PICK THE FINISH
Pro Tips for Doing: Safety should be your priority. If you are not a professional drywall tradesman, you should consult one before removing any drywall. A professional will check for electrical lines, plumbing, and other hazardous conditions that might exist – such as asbestos or lead-based paint.
Proper eye protection, gloves, and masks are always important.
We have the tools you need to create a flawless finish – every time.